The Last Siege of Malko – Bretonnia Vs Empire Wednesday, May 23 2012 

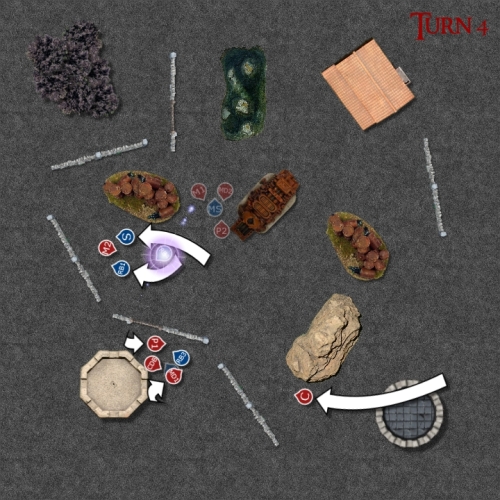
We entered into the last turn of our campaign with furycats Empire army knocking on my door again. Having been repulsed for the previous 4 turns I was not hopeful my luck would hold out this time, despite my points advantage that came from being dug in against the enemy. It seems the Empire decided on a new plan of attack with us fighting in a Battle for the Pass. Presumably the Pass in question is between the massive stacks of corpses outside Malko. We rolled up terrain getting a Wyrding Well, couple of regular buildings, River of Death ™ (or maybe water, but mostly Death), a Forest, A Temple of Skulls and an Idol of Gork.

I went for a fairly standard list as I don’t really know what to expect from Empire yet.

Lord Guillaume L’Echec
– Virtue of Heroism
– The Heartwood Lance
– Charmed Shield
– Gauntlet of the Duel

Prophetess
– Chalice of Malfleur
– Level 4 Wizard (Life)
– Warhorse

Damsel
– Prayer Icon of Quenelles
– Level 2 Wizard (Life)

Damsel
– Dispel Scroll
– Level 2 Wizard (Beasts)
– Warhorse

Paladin
– BSB
– Dragonhelm
– Warhorse

11 Knights of the Realm
– Gleaming Pennant
– Full Command

10 Knights of the Realm
– Full Command
– Banner of Chalons

39 Men at Arms
– Standard Bearer and Musician

3 Pegasus Knights

9 Questing Knights
– Full Command

8 Grail Knights
– Full Command

Field Trebuchet

Field Trebuchet

Nothing too exciting, but then there’s a limited amount of good things in my book.

The Empire Army shaped up along these lines

Wizard Lord
– Level 4 Wizard (Death)
– Pegasus

Luthor Huss

Warrior Priest

50 Halberdiers

14 Handgunners

9 Inner Circle Knights

4 Demigriff Knights

5 Pistoliers

Great Cannon

Steam Tank

Celestial Hurricanum

Steam Tanks make baby Jesus cry, luckily I have brought a Lord specifically designed to kill things like Steam Tanks. We deployed our armies with the Great Cannon going on the hill I bravely hid all my Knight behind buildings.

I gave up the choice to go first or second, furycat being a right thinking person went first

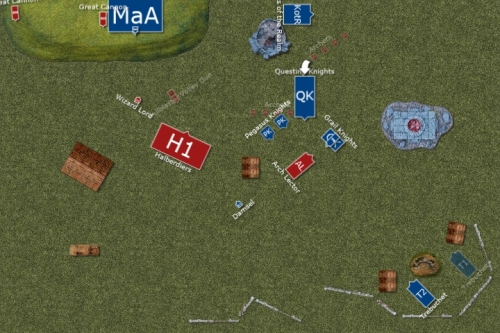
Empire Turn 1

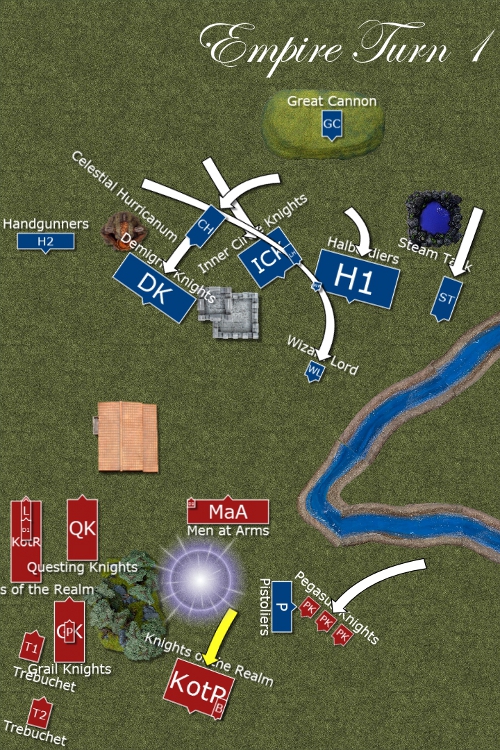
The Empire forces pushed forwards determined to unseat the Bretonnians from Malko, the Death Wizard zips up and makes his presence felt casting a boosted Purple Sun though my Men at Arm and the Knights of the Realm, killing a dozen Men at Arms and 4 Knights of the Realm. The Men at Arms hold thanks to my BSB who then leads his Knightly buddies on a tactical with drawl away from the Purple Sun. The Great Cannon lives up to its name and makes a Knight of the Realm really really dead. The Steam Tank tries to skip a cannon ball outside of its range but just gets it stuck in the dirt instead.

Bretonnian Turn 1

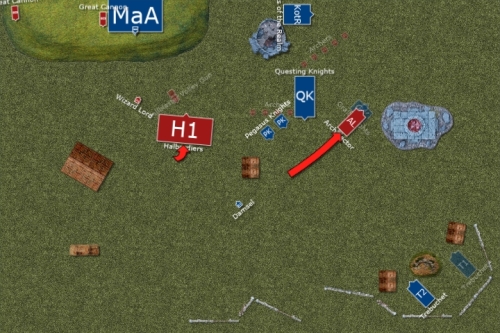
The Pegasus Knight objected to the Pistoliers being in my deployment zone so charged them, trying to avoid getting trampled to death my magical flying ponies they fled, losing 2 to dangerous terrain. The Pegasus Knights caught them and trampled them to death anyway, and avoided hurting themselves on trees or falling out of reality, success. The rest of my Knights pushed forwards in the lee of he buildings to avoid cannon fire and the Men at Arms jumped into the building. My BSB and his cohorts stop retreating and decide to try to take part in the battle.  The Purple Sun got dispelled and Dwellers failed to cast so uneventful magic phase. One Field Trebuchet misfired but the other killed 6 Halberdiers, less treachery from my Trebuchets today, the peasants will get less beatings for this.

Empire Turn 2

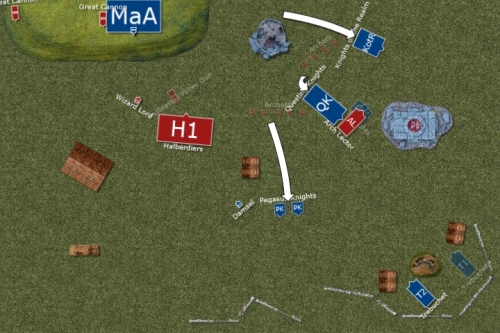
The Demigriff Knight bravely backed up away from my Lord and his unit, not wanting to be on the end of a Heroic Killing Blow, The Death  Dick Wizard flies about on his magic pony out of sight. The Steam Tank rumbles forwards at full speed supported by the Inner Circle Knight as both armies jostled for position to get the favourable charges. This time the  Death  Dick Wizard gets his Purple Sun dispelled but Fate of Bunja strips a wound of my Lord making him derpy for the rest of the battle. The Handgunners kill a single Knight, I think they might have been focused on putting their running shoes on. The Cannon gets so excited at a straight shot on my Knight that it misses.

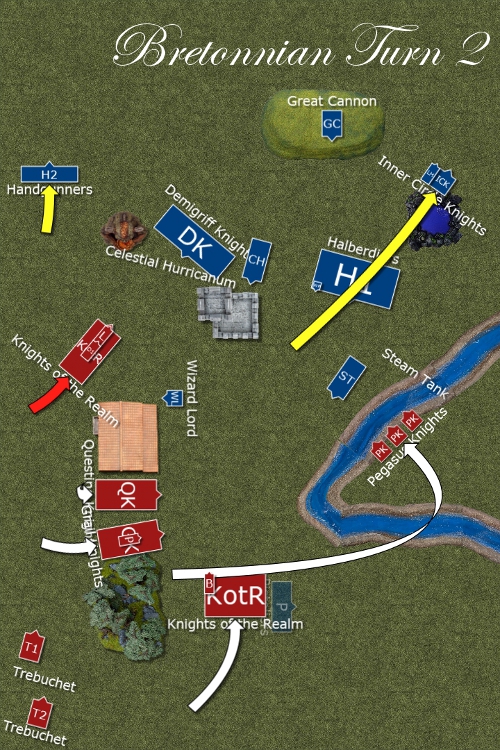
Bretonnian Turn 2

Now I’m going to prefix this turn by saying I have a reputation for dice doing bad things when I’m near them. My Lord with his unit try a reasonable charge at the handgunners who, having put their trainer on, leg it. I redirect toward the Demigriff but it’s a long charge and it fails. In other movement I reposition my army to tackle the Inner Circle Knights and Steam Tank. Dwellers was dispelled again but Regrowth saw me regain 2 of my Knights of the Realm from my BSB unit. My loyal Trebuchet then fired at the Inner Circle Knights scoring a direct hit which killed 4 of them, the broke and fled through dangerous terrain which killed another 3, oops.

Empire Turn 3

I continue to curse furycats dice and his Steam Tank helpfully explodes. In a fit of pique the Demigrff Knights decide to get stuck in and Death  Dick Wizard flies behind my lines. Luther Huss remembers he’s not a pussy and gets back in the fight, well back to the Wyrding Well to drink deeply. The foul magics of the well resurrecting 3 of the Knight in the Warrior Priests unit……..wait a second Luther, are you sure you’re a Warrior Priest?. Another Purple Sun blasts out killing 4 Grail Knights but he Soul Blight on my Lord is dispelled. The Cannon regains its composure and detonates a Pegasus Knight. In combat it turns out one of the Demigriff charges straight onto my Lord’s lance, making a Demigriff Kebab, one Knight of the Realm gets killed and everyone else flails ineffectually. The Demigriffs break and are run down.

At this stage furycat throws in the towel with his army in disarray or exploding around him. It was kind of  a weird game all in all. Look fairly even,  jockeying for position before furycats dice exploded and it all went down hill very rapidly for him. But a wins a win and Malko successfully defended.

First Malifaux Report – Showgirls Vs Zombie Hookers Tuesday, Apr 17 2012 

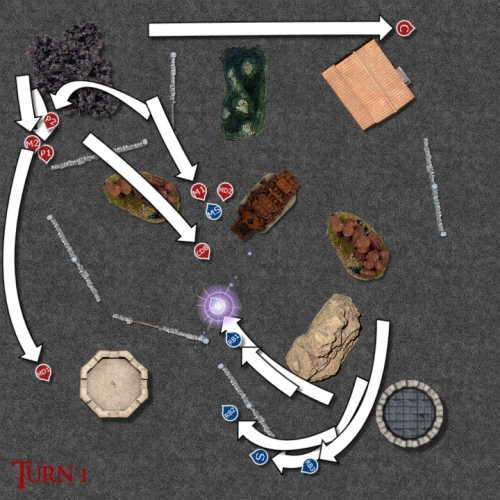
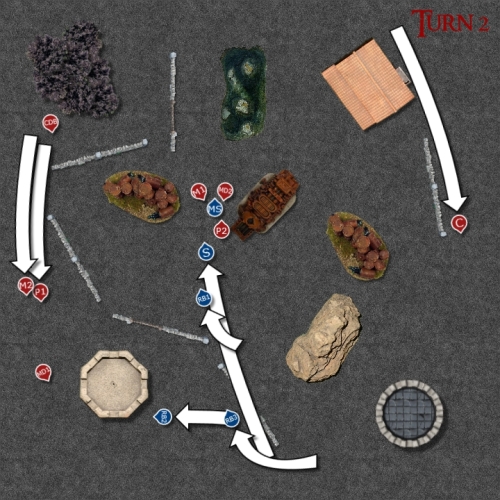
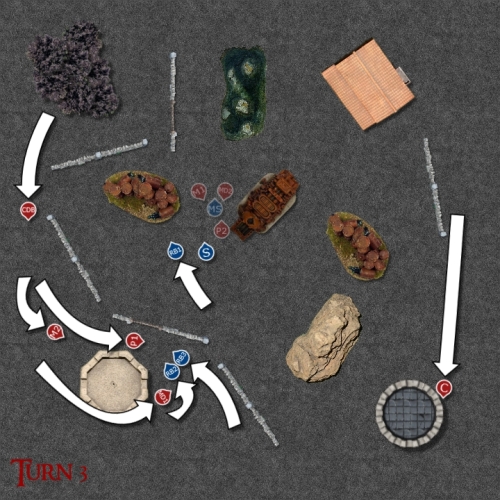
Having worked out roughly what the rules are, forkbanger and myself set about having an actual game. I seem to have some sort of unnatural lure to trick factions in games. So with my mind thoroughly bended about how I was supposed to play Showgirls we commenced setup. We pulled Ancient Ruins with some Arcane Apparatuses , doing corner deployment. We both got different things to do, I got Reconnoitre and forkbanger got Slaughter, I probably should have reflipped my Strategy but I have no idea what I’m doing so I didn’t. forkbanger announced he was going to be Assassinating and Bodyguarding whilst I went for Power Ritual and a hidden Sabotage. Now due to the nature of my faction the maps are almost impossible to decipher, more like arcane runes than an actual map. But they should hopefully give an idea for the layout, the movement arrows are a little misleading as there was a lot of teleporting going on.

Here’s the forces we chose for this clash of the titans

Resurrectionists

Seamus
Madame Sybelle
Rotten Belle
Rotten Belle
Rotten Belle

Arcanists

Colette Du Bois
Cassandra
Performer & Mannequin
Mechanical Dove

These were the highly strategic choices of the model we have.


My plan was simple, push Cassandra around the board to complete the Ritual whilst trying to pin the Zombie Hookers down in one quarter.

Turn 1 : The Zombies won the Initiative and shuffled forwards tentatively, everything was out of range really. Cassandra made a dash for the opposite corner and thanks to Nimble and Confident was able to complete the Power Ritual there. Madame Sybelle move forwards more confidently. I companioned my faction and moved forwards, reactivating Colette in the process.  Seeing an opportunity I used my reactivation to Illusionist Colette with the Performer and cast Disappearing Act on Madame Sybelle to Bury her. Bringing her back in combat with a Mannequin and a Summoned Mechanical Dove. My remaining Performer did the Power Ritual and dragged her Mannequin forwards. So far so good.

Turn 2 – I won Initiative and decided to try to beat the grotesque madame to death but she was having none of it, doing a paltry 3 wounds to her. She was much more convincing with a Flurry taking 4 wounds and inflicting Rough Trade on Colette before I could Blinding Flash and switch with my Performer again, who promptly poisoned Sybelle. The Zombies danced around luring themselves closer to the action with Seamus moving to the melee in the middle to help out poor Sybelle. Cassandra continued to head for the back corner and my Performer dragged her Mannequin forwards more towards the last corner.

Turn 3 – The Zombies won the Initiative and Sybelle tried to beat her way out of trouble but after sacrificing the Mechanical Dove to aid the Performers defence she only ended up doing 2 wounds, The Performer flailed haplessly against the undead dominatrix but then the Mannequins clothes proved so beautiful that it exploded taking Sybelle with her. Seamus, displeased by this course of action slit my Performers jugular before Arising his new redeaded Sybelle back as a Belle. Colette tottered forwards healing herself on the way trying to work out what trouble she could get into next. Cassandra scooted down, and Sabotaged the building successfully. My solo performer did the final Power Ritual but then got lured away by some Zombie hookers, much to her Mannequins distress. Using the Dove to Magicians Duel the Zombies lightly.

Turn 4 – The Rotten Belle fighting my Performer proves to have devilishly sharp claws and teeth, killing her. Seamus decides he’s had about enough of the Showgirl fancy breathing ways and tires to make them all die. Arising my performer as a Rotten Belle and moving towards Colette who had been lured closer. Luckily it wasn’t Colette it was just a Mannequin who wanders into melee with Seamus and pins him there. Colette and the Mechanical Dove finish off a Rotten Belle bringing the Soul Stone Kill Points to  10 vs 12, I’ll need to kill something else here. Colette uses Disappearing Act on two of the Belles and scoots away to hide them behind some terrain at the end of the turn. Cassandra completes the last act of the Power Ritual and scoots in to get her stab on.

Turn 5 – The Zombies go first and start by beating up Colette again, shaving a couple of wounds off her. Cassandra loves to stab and charges in doing some decent damage to a Rotten Belle who gets finished off by my Beautiful Clothes being Full of Pins. Seamus misses his trigger and fails to just murder Cassandra, instead making her insignificant. After some epic Willpower Resists Colette doesn’t get lured into a Zombie death trap.

Turn 6 – There’s no map for Turn 6 and not a lot happened, I ran away and avoided getting murdered. Colette was lured in close and almost killed but I burned though my last few Soul Stones to avoid it. The game ended and Cassandra used her Grande Finale to move closer to Colette in the hope of not dying to Semuses trigger. Saldy she did anyway, giving forkbanger 21 SS to 14 for slaughter.

Totting up the points I had 2 for Power Ritual and 1 for Sabotage, getting none for Reconnoitre. Forbanger got 2 for Bodyguard and none for Assassination but 2 for his Slaughter Scheme giving him 4 total. The End result, Arcanists 3 – Resurrectionists 4. Boo.

In the end it went a lot better than my first game but I still don’t quite have the hang of how to play Showgirls, or Malifaux for that matter. I think I would have done a lot better if I had reflipped my Strategy and had gotten something useful out of it. I think the best thing we did was not having any glaring rules errors this time, hopefully.

Entering the World of Malifaux Wednesday, Mar 14 2012 

Some time ago Argentbadger suggested having a go at Malifaux as a bit of a change from our usual games, something a bit smaller and more skirmish based. So myself,  , Argentbadger and Justin have decided to give it a go, each picking up one of the starter boxes and some rules. None of us have any idea what we’re doing so we’ve gone for essentially blind choices based on what looks cool.

Argentbadger has gone for the Witchhunters after much indecision,

She seems to be a crazy lady with a sword who loves to stab, but more than that loves to burn witches. They do say she just only goes after unsanctioned witches so presumably the best defence against her is a high level in bureaucracy to ensure all your paperwork is in order. I think that might just be a cover story though to hide the fact she just loves to stab.

 has gone for The Red Chapel Gang

I assume this is because of his love of dead hookers. They are led by a man with an outrageous hat and a hand cannon who is presumably a pimp. I have no idea what use dead hookers are in a fight but I do not want to know what kind of services this woman provides

That does look like a golf club she is carrying, I’m not sure what to make of that.

Justin has chosen to go for the Miners and Steamfitters Union

These guys seem to be crazy steampunk engineers who take enforcing Union rules very very seriously. I don’t remember seeing a union before who had an ‘Executioner Class’  Union official. I assume they are in charge or making sure people vote the right way?

I’ve gone for the Showgirls

The models look quite entertaining, and I like the mannequin models. One of the Showgirls does have a massive sword which must be part of her act or something, but I think she also loves to stab. I have absolutely no idea how a bunch of Showgirls are supposed to fight a giant mechanical Union Rep or zombie hookers and I suspect those walking mannequins are probably magical in some way and without a permit. After doing a little reading online I have discovered Colette is one of the hard Masters to play and one with the most rules, go me. Also one of the most annoying to play against, so swings and roundabouts. All that matters is that I have a jaunty hat and no one else has a jaunty hat, thus my faction is the best.

The Siege of Malko – Bretonnia vs Empire Tuesday, Oct 18 2011 

With the Bretonnian army sitting in Malko unmolested for some time now the mighty forces of the Empire decided that this was an intolerable situation and set out to molest them, most vigorously under Furycat’s command. Luckly the Bretonnian army had not just be 24/7 partying and had remembered to fortity the castle against unwanted advances, the sallied forth (perhaps unwise from a fortified position but that’s just how they roll) to meet the Empire on the plains of battle.

The Empire Forces (2200 points)

Arch Lector of Sigmar
+ Armour of Meteoric Iron
+ Dawnstone
+ Other Tricksters Shard

Wizard Lord
+ Rod of Power
+ Lore of Life

Captain of the Empire
+ Battle Standard Beaerer
+ Biting Blade
+ Talisman of Preservation

Battle Wizard
+ Dispel Scroll
+ Lore of Shadows

29 Swordsmen
+ Full Command

5 Archers (Detachemnt)

29 Swordsmen
+ Full Command

5 Archers (Detachemnt)

50 Halberdiers
+ Full Command

12 Handgunners
+ Marksman with Hochland Long Rifle

12 Handgunners
+ Marksman with Hochland Long Rifle

Great Cannon

Great Cannon

Great Cannon

Hellblaster Volley Gun

The Muster of Bretonnia (2600 points)

The Fey Enchantress (Lore of Metal)

Damsel
+ Dispel Scroll
+ Lore of Beasts (level 2)

Damsel
+ Prayer Icon of Quenelles
+ Lore of Beasts (level 1)

Paladin
+ Battle Standard Bearer
+ Virtue of Empathy
+ Dragon Helm

12 Knights of the Realm
+ Full Command
+ War Banner

58 Men at Arms
+ Full Command

5 Mounted Yeomen
+ Warden
+ Shields

3 Pegasus Knights

9 Questing Knights
+ Full Command

8 Grail Knights
+ Full Command
+ Rangers Standard

Field Trebuchet

Field Trebuchet

The battle was a Meeting Engagement with only the Mounted Yeomen deciding they had something better to do than turn up. The Arch Lector was clearly busy converting some unbelievers and lost track of time along with a unit of hand gunners.

We rolled on the death scenery chart to see what would be our undoing today, we got a Settlement of Order featuring an Acropolis of Heroes, an Altar of Khaine, A regular building (A rarity in the old world apparently), Some Blessed Bulwarks, an Anvil of Vaul, a Sphinx, some Arcane Ruins and shockingly another regular building.

With the Fey Enchantress leading the Bretonnians to glory they took the first turn for the first time.

Deployment

The Empire deploying their guns on the hill, screening them with the Halberdiers and Swordsmen, the Bretonnian Army getting as close as they can eager to get into a fight.

Bretonnian Turn 1

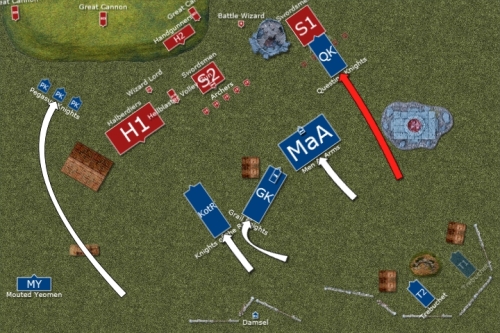
The Questing Knights decide to get their stab on Early, charging headlong into some hapless Archers, the rest of the Bretonnian army taking an altogether more measured approach and moving forwards slowly. The magic phase sees The Fey trying to turn some Swordmen into nice ornamental gold statues but in a display of unsporting behaviour the Empire wizard dispels it, she has to make do with Glittering Robe on the Knights of the Realm instead. Treacherous Trebuchet 1 decides it’s all too much and ends itself,  presumably trying to fire parts of itself at the enemy or something. Trebuchet 2 shows much more promise squashing 10 Swordsmen from S2 into a fine meat paste. In combat the Questing Knights make short work of the archer screen and barrel through into the Swordsmen behind them.

Empire Turn 1

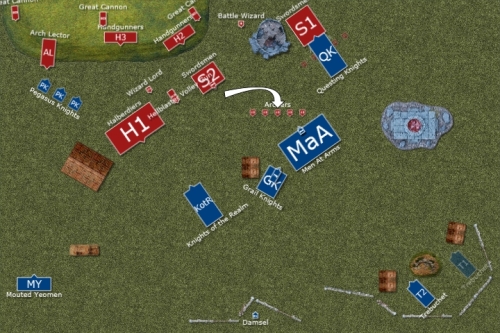
The Empire take an altogether more cautious approach, move the Arch Lector on to annoy the flanking Pegasus Knights and move the Archer screen up to redirect charges. The Magic Phase is an uneventful (3,1) with the Battle Wizard meddling with powers beyond his control to channel a couple more dice. Mystifying Miasma gets dispelled as is a Flesh to Stone and Banishment, the Fey Enchantress making her presence felt.  The Hellblaster unloads, attempting to ventilate some poor Knights of the Realm but jams on the second barrel, inflict 10 hits but only felling a single noble warrior. The Great Cannons do a bit better between them and hand gunners 4 Grail Knights die and 2 more Knights of the Realm. In combat the surprised Swordsmen fail to stabberate anyone and get 5 of them perished in return but they’re Steadfast.

Bretonnian Turn 2

The Mounted Yeomen move forwards to see if they can do anything to the Arch Lector (hint: They can’t), The Men at Arms can see a fight which will favour them and charge the Archers who hold. The Knights of the Realm possibly weighed down by all the extra cannonballs and lead shot they’ve acquired fail to charge the Hellblaster. The Pegasus Knights not wanting to get shot get their stab on against the Handgunners that just arrived.  The Magic Phase (5,1) is uneventful with only a Wyssans Wild Form on the Knights of the Realm squeezing through. The Trebuchet shows it’s class by firing wildly and squashing a few more Swordsmen.  In combat the Questing Knights hack down a few more Swordsmen and lose one of their own in return but the Swordsmen remain steadfast. The Men at Arms, bouyed by outnumber their opponents over 10 to one beat the hapless Archers to death an reform. The Pegasus Knights stab a few ignoble handgunners and pursue them off the board.

Empire Turn 2

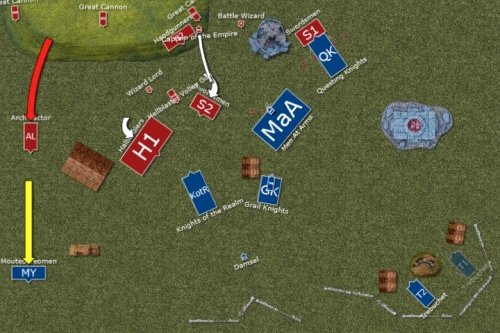
The Arch Lector decides to get his crazy on by trying to beat some Mounted Yeomen to death who decide to runaway, the rest of the Empire army jostles for position, the BSB abandoning his Swordsmen buddies before yet another rock lands on them. The Magic Phase is low (4,2) which results is everything either failing or getting dispelled, masters of magic. The Hellblaster is busy clearing it’s jam so the cannons got to work, killing 1 Knight of the Realm, doing 2 wounds to the Trebuchet and missing entirely. Combat goes the way of the Questing Knights again, kill 4 more Swordsmen but they hold fast.

Bretonnian Turn 3

As you can see this is where the game went a bit wrong. The Knights of the Realm charged the depleted Swordsmen, the Mounted Yeomen bravely flee the table and the Fey Enchantress hides behind a build from cannonballs. The Men at Arms just marching forwards amid the confusion. The Pegasus Knights remember theres a battle going on and creep back onto the board. The Magic Phase is very low (2,1) but the Fey Enchantress manages to push an Enchanted Blades of Ablian onto the Knights of the Realm. The Trebuchet feeling cocky lands a rock on the Hellblaster Volley gun, killing it. In combat the Knights of the Realm kill a single Swordsmen which proves to be the straw which broke the camels back and makes them flee, the Knights of the Realm pursuing them off the board. The Questing Knights finally break the other Swordsmen and they flee the table. The Knights of the Realm contact the Battle Wizard.

Empire Turn 3

The Arch Lector, feeling good about running off the Yeomen pushes roud the side with the Halberdiers in support. The Magic Phase (5,2) sees the Halberdiers get Flesh to stone but everything else failed or dispelled. The cannons blast a few shots into the poor Pegasus Knights, denying the Power of Friendship, a couple of Questing Knight meet their untimely demise as well. The Knight of the Realm overrun the Battle Wizard and leave the table as well.

Bretonnian Turn 4

The Pegasus Knights and Men at Arms get very excited and both charge the Handgunners. The Damsel moves up to try to redirect as the Fey cowers from cannon fire. The impending Arch Lector obviously throws the Enchantress off her game failing to cast anything at all. Remarkably the Men at Arms and Pegasus Knights fail to kill all the Handgunner but do break them, the Pegasus Knights failing to restrain and perusing them off the board again. The Men at Arms following up into a cannon (As my map doesn’t show so you’ll have to use your imagination)

Empire Turn 4

The Arch Lector goes for it, squeezing past my Damsel and rear charging my Grail Knights. With the Halberdiers reforming to face where my Army will be returning from shortly. The Battle Wizards ghostly apparition floats about my map to confuse people. In the Magic Phase the cannon the Men at Arms are fighting (use your imagination) gets Flesh to Stone, Shield of Thorns and Pha’s Protection cast on it, not that it save it from being destroyed and my Men at Arms running off the table. In combat a Grail Knight fights a challenge with the Arch Lector which amounts to nothing but the Lector wins through static combat resolution and the Grail Knights bravely flee, getting an inch further than the Arch Lector.

Bretonnian Turn 5

The Bretonnian Army shows up again but just kinda potters about unsure what to do. The Fey whips her bodyguard into shape in short order. The Damsel tries a hopeful Curse of Aniheir on the Halberdiers but it’s dispelled. The Trebuchet content that it’s work for the day is done fires rocks over the battlefield wildly missing everything.

Empire Turn 5

The Arch Lector decides he can have her unicorn (sadly not Unicron) riding ass and charges in again, the Halberdiers presumably bored of just wheeling around in midfield try to charge but realise they’re heart really isn’t into this endless conflict and try to give peace a chance. The Wizard Lord masters magic and Flesh to Stones the Halberdiers again but nothing else of note. The cannons show their displeasure at the Men at Arms and blow a few to bits.  In Combat the Arch Lector defeats the Grail Knight in the Challenge and break them again, running the Fey Enchantress down this time. Oops.

Bretonnian Turn 6

With their General dead the Bretonnian army goes for damage limitation milling around slightly aimlessly just trying to avoid being exploded. The Magic Phase produces nothing that isn’t easily dispelled by the Wizard Lord with the Arch Lectors support. The Trebuchet continues to fire to victory rocks into the sky.

Empire Turn 6

Despite what the map shows the Halberdiers can’t get the angle on the Men at Arms so nothing much happens. The Wizard Lord goes for a last ditch Dwellers but has it scrolled. The Cannons blow apart another Pegasus but don’t destroy anyone.

Final Scores, it comes down to Victory Points to determine the winner, after armies are counted, banners and generals weighed up it turns out Bretonnia 1344 vs Empire 1304 so a draw. The Empire are repulsed from Malko in a pyrrhic victory of sorts for the Bretonnians.

The Final result was not great for me, getting my General and Bodyguard run down by the Arch Lector cost me 1049 Victory Points , if only I had moved my Damsel into position correctly. I think what I need to take from this is that I need to be aware more of Victory Points and not have units of such high value in play at all.

Inquisition Dreadnought – Mr Stompy Friday, Jun 17 2011 

So I want to play a pure Inquisition force, none of these Grey Knights messing up my theme, but I realise I need some long range fire support. So I need some Dreadnoughts, that said I do not want the Space Marine Dreadnoughts, I want stompy robots with giant Autocannons, ones big enough that men could pilot them.

In steps Dust Tactics and the Panzer Walker variant.

The model comes prebuilt with 6 different arms, 3 for each side, here it has the Autocannons. It also has Rocket Pod arms, a Claw arm (DCCW) and a Heavy machine gun (Assault Cannon)

Rocket Pods

I blame Forkbangers dodgy photography for the graininess.

Now don’t get me wrong, this thing is big, very big but it fit the scale correctly as it looks like it could be piloted unlike a Dreadnought.

That’s it side by side with Forkbangers WIP dreadnought.
It’s obviously a lot taller than a Dread, about the same width on a slightly bigger base, and depending what my opponent wants play it as is as it doesn’t really advantage me or same size as a regular dread. I really like the model as the guns look suitably heavy for a S8 Autocannons and it looks like something the Imperium could make. I’m just adding some inquisition logos to it and then to base coat it. It’s going to be a bold experiment at trying to paint yellow over black for black and yellow warning strips.

A Letter to the so called Empire Monday, May 9 2011 

When we accepted your advances as allying against the beasts of the forests we did so as men of honour and we expected the same from you. Having taken the field with you we can see you for what you are. Dogs of men, not worthy of the peasantry of the fine land of Bretonnia. You do us a disservice with your lack of honour, you disgrace us with our association with your cowardly tactics. You call yourself men? A real man of honour leads from the front, leading the lance tip into the heart of the foe driving them from the field like chaff, not lolly-gagging around with your devil’s black powered weapons.

Our Lady has spoken to me and she cannot countenance our alliance any longer, it disgraces the memory of our forefathers.  But I am an honourable man and I shall accept your withdrawal from the Old Silk Road unmolested as acceptance of your need to correct your ways. Failure to do so will be a clear incitement to war and we shall have no hesitation in putting your to the sword and lance.

Our Lady guides our hand, we cannot be defeated with her blessing.

Lord Guillaume L’Echec

The Inquisition Vs Red Templars (1500pts) Thursday, Apr 28 2011 

So I’ve made up my fun little war band of Inquisition from the Grey Knights Codex. This was my first game out and something quite different for me. My normal armies are low model count elite armies like Eldar and Blood Angels, this on the other hand is a horde of mooks herded by some other mooks. So this is what I took

HQ

Coteaz

Ordo Malleus Inquisitor
– Terminator Armour
– Psycannon
– Psyker (Hammerhand)
– 3 Servo Skulls
Elites

Vindicare Assassin

Troops

Coteaz’s Bodygaurd
3 Plasma Servitors
2 Jokaero Weaponsmith
6 Warrior Acolytes
– 3 Meltaguns
– 3 Storm Bolters
Chimera

Malleus Bodyguard
7 Warrior Acolytes
– 4 Storm Bolters
– 3 Meltaguns
3 Death Cult Assassins
Chimera

Stormtrooper
10 Warrior Acolytes
– 7 Stormbolters
– 3 Plasmaguns
2 Deathcult Assassins
Chimera

Stormtrooper
10 Warrior Acolytes
– 7 Stormbolters
– 3 Plasmaguns
2 Deathcult Assassins
Chimera

Stormtrooper
10 Warrior Acolytes
– 7 Stormbolters
– 3 Meltaguns
2 Deathcult Assassins
Chimera

Stormtrooper
10 Warrior Acolytes
– 7 Stormbolters
– 3 Meltaguns
2 Deathcult Assassins
Chimera

All Inquisition all the time!

My first game would be again furycat and his All Bike All the time list, lots of bikers and a Land Raider full of Terminators for good measure.

HQ

Space Marine Captain
– On a bike with a Relic Blade

Command Squads
– Tooled up with an apothecary

Troops

Space Marine Bike Squad
– Multimetla Attack Bike
– 2 Melta Guns

Space Marine Bike Squad
– Multimetla Attack Bike
– 2 Melta Guns

Elites

Assault Termintors
– Thunderhammers & Storm Shields
– Landraider Crusader

We rolled up a mission and got a Pitched Battle – Dawn of War – Kill Points, I won the roll off and decided to Deploy and go first.

Deployment –

Deployment

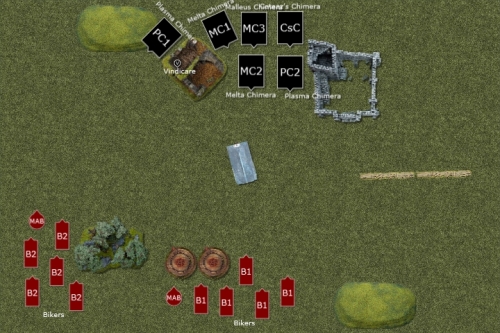
Inquisition Turn 1 – As you might expect this was a very uneventful turn as the Inquisition rolled into town, perhaps wondering why we had decided to come and try to beat up some Space Marines on bikes. Perhaps their biker bar was getting all rowdy or some Sons of Anarchy style ne’erdowells were causing trouble.  I had no idea what do to with so many tanks, so I parked them between the two buildings neatly and in accordance with the local parking restrictions.

Inquisition Turn 1

Red Templars Turn 1 – Having seen us turn up and park in such an orderly fashion furycat decides

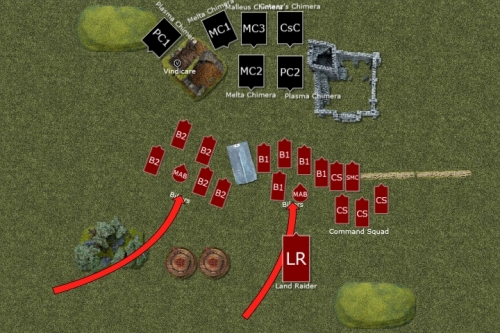
as it where, flooring it and turbo boosting everyone straight at me. The Command Squad with Captain coming on the right hand side, Land Raider in the middle. The combination of night and Turbo Boosting means nothing exciting happens.

Red Templar Turn 1
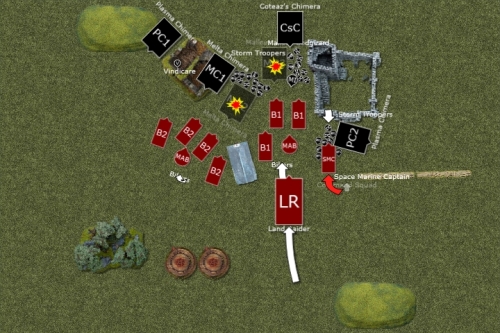
Inquisition Turn 2 – With furycats subtle tactic of all out attack I decided on a more carefully measured approach, then abandoned it in favour of all out attack. I circled in front of his Command Squad with one Plasma squad, he has his 3+ cover saves but volume of fire has to count for something, doesn’t it? Both Melta squads turn their attentions to Bike Squad 2 with Coteaz and the Inquisitor focusing on Bike Squad 1. My second Plasma unit staying out of trouble for now. In shooting I pour an unreasonable number of Storm Bolter, Plasma, Melta, Plasma Cannon, Multilaser shots into the bikers. After the smoke clears I’ve killed 3 of the Command Squad, 2 out of Bike Squad 1 and a single bikers out of Squad 2. So 6 Squads of shooting and I kill 6 guys, good work boys.

The Inquisition Turn 2

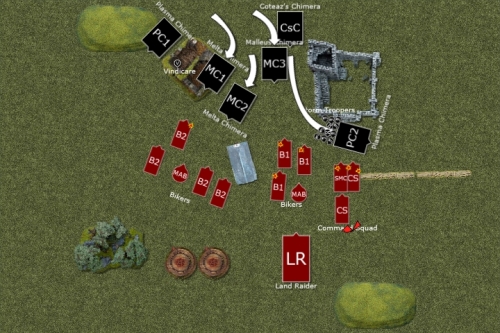
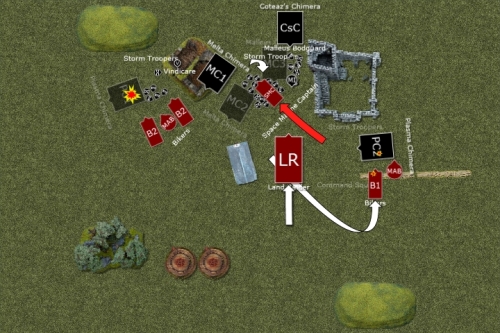
Red Templar Turn 2- Furycat, angered by the temerity of my dudes to scratch his armour decides to unleash a righteous ass-kicking. He presses forwards with everyone, holding the Terminator Surprise still very much in the surprise stage and not in the Face/Hammer interaction stage yet. Melta Squad 2 (MC2) and my Inquisitor (MC3) get their pimpin rides blown out from under them and wrecked, foolishly I had moved MC3 in such a way as when I got wrecked I had to emergency disembark a lesson learned there. The Command Squad and Captain then decided to try to wreck faces by assaulting my Plasma Squad, cavalierly disregarding Coteaz’s magical space brain casting sanctuary .  The last two remaining members of the Command Squad promptly drove into space trees and died.  The Captain sadly didn’t suffer any such fate and proceeded to see if my Plasma Squad would blend. Luckily they didn’t blend too badly and passed the moral check to stay in combat.


Inquisition Turn 3 – Things were going essentially as planned just now, so perhaps I should have planned for something other than be stabbed to death by angry space marine bikers. Plasma Squad 1 came out of hiding to unleash their superheated fury on Biker Squad 2. With everything else turning its attention inwards towards Biker Squad 1. Plasma Squad 1 and Melta Squad 1 did an admirable job reducing the bikers down to 3 men. The other Biker Squad faired just as badly, getting cut down to sergeant and Attack bike. My Vindicare decides to try to make a different, shooting the Assault Cannon off the Land Raider. In combat my Death Cult Assassins fail to get their murder on and the Captain breaks the unit, running them down to a man.

Red Templar Turn 3 – Biker Squad 1 decide to go get themselves so delicious kill points by hunting down my chimeras, the Land Raider rumbles forwards unleashing it’s righteous fury on my Inquisitor’s unit,  killing off a bunch of Deathcult Assassins. Biker Squad 1 shows why they’re the Imperiums finest failing to blow up the Chimera, charging it anyway only for the Powerfist wielding sergeant to decide the futility of war was all too much, killing himself on terrain. The other bikers fare better, exploding the chimera spectacularly, killing 6 of the former occupants in the blast. The Captain continues cutting his bloody swathe through my dudes, setting about Melta Squad 2 with vigour.

Inquisition Turn 4 – Seeing the land raider bearing down on me I decide the best course of action is to try to ramp my other Chimera over the wrecked one, dukes of hazard style. This works to and extent but it’s obviously all too exciting for the occupants who miss with all their melta guns. Similarly the Inquisitors melta guns all miss as well so he shows them how it’s all down, wrecking the Land Raider with his Psycannon, disembarking some angry-looking Terminators in front of them. The Vindicare shoots the Storm Shield off one Terminator by shooting him straight in the face, another is felled by Coteaz’s friends. Plasma Squad 1 avenge the death of their pimpwagon by annihilating Bike Squad 2 under a hail of plasma. In combat the Death Cult Assassins prove their worth taking a wound off the captain and drawing the combat. My inquisitor then leads his Deathcults on a do or die assault on the Terminators. It turns out to be mostly die but they stick around for another turn.

Red Templar Turn 4 – Furycat’s forces now consist on a Multimelta attack bike and 3 Terminators, but he is still comfortably ahead on kill points. The attack bike continues to try to melta then dry hump my chimera to death, leaving it immobilised and weaponless. With nothing else to do the Termintors beat my hapless Inquisitor and Deathcults to death and head off for a picnic behind the large building.

Inquisition Turn 5 – Buoyed by their previous success Melta Squads 1 Ramp their Chimera off the Land raider perform a mid-air pirouette to disgorge  it’s dudes on the other side. They make short work of the attack bike but the rest of my forces only manage to bring down 1 more terminator.

Red Templar Turn 5 – The 2 man army decide to just go for it, charging into Melta Squad 1, beating a bunch of the to death and making them start to flee from the table. They celebrate by bravely hiding out of sight behind a building.

There’s 1 more turn where I killed 1 more Terminator but it’s not enough, the game ends with Red Templars glorious victors 7 – 5 on Kill points with a single man left alive.

It was my first time out with this kind of army and I made a bunch of schoolboy errors but taking nothing away from Furycat, he played a good game and held back those Terminators till the critical point.

Blood Angels vs Red Templars (1500pts) Monday, Jan 10 2011 

So myself a Furycat in a fit of peak decided to have ourselves a nice game of 40K in lieu of Warhammer, Marine on Marine, Red on Red. Having taken some leave of my senses I decided to try out The Sanguinor, I had previously tried Mephiston and found him to be fun so why not.

The Angelic Host

The Sanguinor

2 Sanguinary Priests
– Jump Packs

5 Sanguinary Guard
– Chapter Banner
– Power fist
– 2 Infernus Pistols

10 Assualt Marines
– Power fist
– 2 Meltaguns

10 Assualt Marines
– Power fist
– 2 Meltaguns

Storm Raven
– Assault Cannons
– Multimelta

Vindicator (I had points but no more dudes, hence the rather random tank)

Furycat can chosen a very challenging list, certainly had more bodies than I did.

Librarian
–  Null Zone
–  The Avenger

10 Tactical Marines
–  Flamer
–  Multimelta
–  Rhino

10 Tactical Marines
–  Flamer
–  Multimelta
–  Rhino

5 Terminators
–  Assault Cannon

6 Sternguard Veterans
– 2 Combi Meltas
– 2 Heavy Flamers
– Rhino

6 Sternguard Veterans
– 2 Combi Meltas
– 2 Lascannons
– Rhino

Predator
– Autocannon
– Heavy Bolters

Predator
– Autocannon
– Heavy Bolters

Land Speeder
– Typhoon Launcher

Land Speeder
– Typhoon Launcher

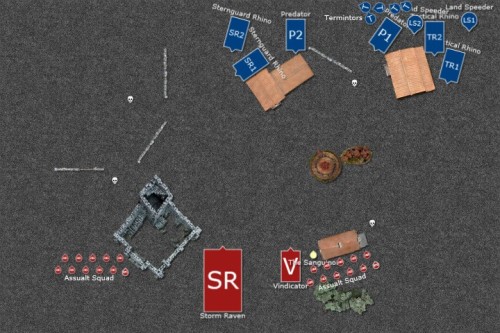
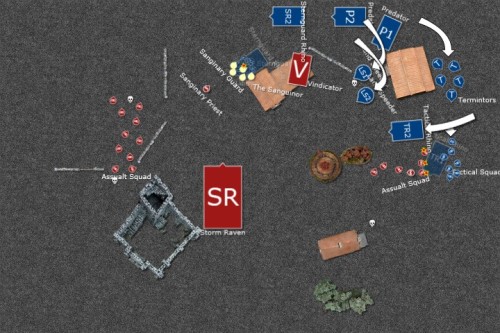
A tricky list indeed to get around. We rolled up out mission and got Take and Hold, 4 Objectives (as shown by the skull markers). I won the Roll off and decided to set-up first, and go first.

Deployment

Furycat goes for a denied flank style deployment which kinda suits me. My initial plan is to try and deny his denied flank by attacking across the board, but plans never survive contact with the enemy.

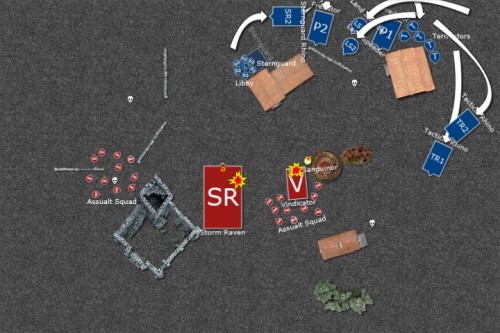
My turn one the Sanguinor raises a might rallying cry and the Blood Angels surge forwards, going across the table to force those tactical squads to come and find me. Assault squad one moves up to take an Objective. The Vindicator revs up and makes way, firing hopefully at the Sternguard Rhino just behind the ruins but unable to draw a bead successfully. the Storm Raven is more successful, blowing up the first Sternguard Rhino and Shaking the other. The other Assault squad moves up chasing the Sanguinor into battle it seems.

Furycat moves up from his flank quickly, the Tactical Rhinos making their way towards the Objectives. With the Predators taking pot shots at The Sanguinor, knocking 2 wounds off him worryingly. The Land Speeders show the Blood Angels how to by a flying annoyance by downing the Storm Raven, immobilising it and blowing off the Multimelta. The Vindicator loses it’s gun to the Sternguards Lascannon turning it into nothing more than a rocket powered battering ram.

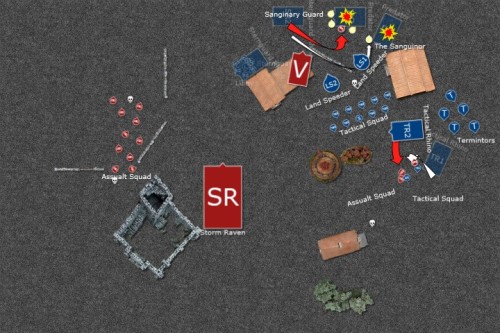
Angered by the Red Templars temerity to shoot him with their guns and shooting down yet another of their revered relics of the Imperium The Sanguinor and the Sanguinary Guard lauch forwards into the Librarian and his Sternguard bodyguards, putting them to the sword without mercy. The Second Assualt squad seeing that their foe had strayed within range made a break for it, jumping towards the leading Rhino. Their Meltaguns pinging off harmlessly, leaving them to assault it to get the job done, Blowing up the Rhino and slaying 3 Marines in the process. This unfortunately left them dangerously stranded. The Vindicator made a bold dash for a Ram, falling just short and beaching itself in some ruins. The Storm Raven, immobilised, fired off all it’s Blood Strikes in impotent rage, doing nothing to anything.

Furycat wasted no time taking advantage of my stranded marines, giving them a serious flamer, bolter, assault cannoning. Only 3 Blood Angels where found wanting though the rest shrugging off the pitiful fire. Fire poured into the Sanguinary Guard from the Predators and Sternguard whilst the Landspeeders blew off the last weapon from the Storm Raven. The Terminators continued their inexorable march up the flank.

This is where I came up with a cunning plan, a plan almost too cunning for my own good. Whilst my other assault squad was getting itself nicely camped down on the Objectives, my active squad changed targets and went after the other Rhino. I wanted to debus both tactical squads and felt this was really the best way to do it. Unfortunately they had their Meltaguns set to ‘Toasted Marshmallow’ and not ‘Vaporised Tank’, immobilising it but nothing more, Assaulting it for good measure but getting Crew Stunned and little else. Frustrated by their brethrens lack of ability the Sanguinary charge headlong at the Sternguards Transport blowing it up with their Infernus pistols and wiping out the contents with the ensuing assault.

The Terminators march forwards blazing away at the hapless Assault Marines, Whilst the Tactical Marines did the same. The Immobilisation of the Rhino did force the other Tactical Squad to get out and move towards the Objective, whilst shooting the Assault Marines as well. My Feels No Pains starts to suffer under the weight of incoming fire, depleting that unit. The Predators and Land Speeders pour fire into the Sanguinary Guard killing another one of them.

Angered by the cheek of these upstart Marine to dent their armour the Sanguinary Guard and Sanguinor rush forwards destroying both Predators, The Land Speeders prevented them from assaulting the Tactical Squad (the Diagram is not too clear but it was impossible to get past the Land Speeders to the Tacticals) . The Assault Squad tries make amends for it’s previous failures, shooting and assaulting the weaker of the two tactical squads, it goes well reducing them to two men.  My other squad starts a camp fire, singing the ancient songs of Baal and toasting Space Marshmallows.

The Terminators get sick of my shit and weigh in on the fight, saving the Sergeant and wiping out the rest of my Assault Squad, the Sergeant making a break for the Objective. The Land Speeders take some pot shots at the other Assault Squad to little effect. Fury Cats tacticals do a lot better this time and wipe out the reminder of the Sanguinary Guard. This is looking like it’s going to be close.

With the rest of my force battered, broken or chilling by the Camp Fire it was up to The Sanguinor to save the day. He charged in, hacking down a number of the tactical squad who choose to fail their break test but the Sanguinor failed to catch them instead choosing to shepherd them off the board.

With the Sanguinor so close the Tactical Squad was forced to fall back off the board, just as the Terminators rounded the Rhino and gunned him down. The Land Speeders made a break for my Objects, turbo boosting but just falling short of their target.

We rolled for the end and that was it, 2 Objectives to 1 in favour of the Blood Angels. In the end it was pretty close game. Fury Cat just leaving it slightly too long to move the Land Speeders across to contest my Objectives. He has already written his thoughts here . Ultimately I’m not sure if the Sanguinor is worth his hefty price tag, he could have died on turn 1 and been worthless, as it happens he survived and buffed the Sanguinary Guard into murdering their way through Furycats flank.

Storm Raven W.I.P Friday, Nov 19 2010 

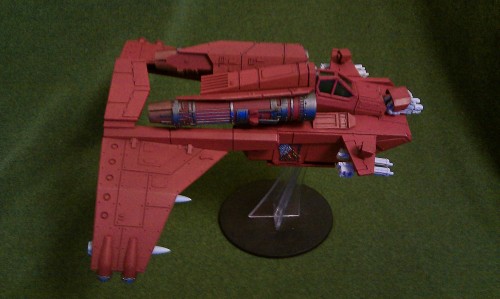
So some time ago I started to build a Stormraven based on the Crux Pattern Stormraven using just the Valkyrie kit. It looked a little like this

In a radical move I have started to paint it up, very very slowly as is my want.

Now I know it has too many Assault Cannons for a Stormraven but I think it looks better when it’s symmetrical. Hopefully at some point before the end of the year I might have actually finished it.

Bretonnia Vs High Elves (1600pts) Monday, Nov 15 2010 

We’re about to start our Border Princes Campaign and the chosen points value is 1600 pts. So myself and Steve decided to try to see what would fit into such a points value. I went with my trusty Bretonnians relaying very much on heavy horse to get the work done. Steve was persuaded to try using a High Elf Dragon Mage by Furycat so this would be a very interesting game.

I decided to run out with

Prophetess (Level 4 Life, Warhorse, Silver Mirror, 4+ Ward Save)

Damsel (Level 2 Life, Warhorse, Power Scroll (I know I know i’m going to hell))

Paladin (Warhorse, BSB, Dragonhelm)

9 Knights of the Realm (Full Command, Banner of Chalons)

9 Knights of the Realm (Full Command, Banner of Swiftness)

3 Pegasus Knights

6 Questing Knights (Full Command)

2 Field Trebuchets

Steve was slightly hamstrung by the inclusion of the Dragon he had something along the lines of

Arch Mage (Level 3 Fire)

Dragon Mage (Level 2 Fire)

20 Seaguard (Full Command)

20 Seaguard (Full Command)

15 Phoenix Guard (Full Command)

15 Swordmasters (Full Command, Ruby Ring of Ruin)

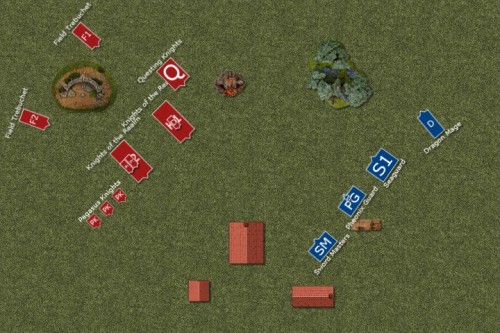
So the battle was set, we were to have a meeting engagement. High Elves won the roll off and deployed first. The terrain was sparse, a few buildings to the south, an Idol of Gork in the centre, a Sphinx off to the south-east and north-east a Mysterious Forest. Lastly an Arcane Ruin in the North west. Only one unit choose not to turn up and that was Steve Seaguard, they would be held in reserve.

Deployment

High Elves turn 1 was fairly uneventful with the Dragon circling round to the north whislt the Seaguard wandered on from reserves. The magic phase was even less eventful with a low roll meaning nothing much happened.
High Elf Turn 1

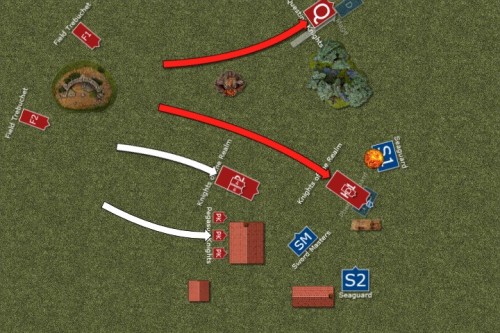
Bretonnian Turn 1, Throwing caution to the wind as is the Bretonnian way it was charing forwards and trusting in Our Lady for protection. The Questing Knight crashed into the Dragon Mage whilst one set of Knights of the Realm tried their luck at breaking the Phoenix Guard. Everything else just marching closer. In the Magic Phase the Damsel bolstered her knights with Flesh to Stone, toughness 5 Knights in heavy armour are hard to deal with.  My trust peasants paid for themselves landing some rocks on the Seaguard, I shall not have to beat them quite as much when we get back to the castle. The Questing Knights did surprisingly well, killing the Mage outright and driving the Dragon off the board, pursuing off the board themselves. the Phoenix Guard were similarly put to the lance overrun to the lamentation of their womenfolks.
Bretonnian Turn 1

High Elf Turn 2, Having lost both his Mages things were looking grim for the High Elves. The Seaguard charged the Knights who had so efficiently dispatched the Phoenix Guard. The Swordmasters tasked themselves with going for the other Knights of the Realm, containing my Prophetess and BSB. With both his Mages expired the magic phase was brief, and everything in combat so was the Shooting. In combat the Seaguard took their vengeance on the Knights, the combined flank charges not killing many but breaking them and forcing them to flee, they choose to reform to face the oncoming Pegasus Knights and Questing Knights. The Swordmasters made short work of a few of the Knights but we bravely (foolishly?) Held our ground.

High Elves Turn 2

Bretonnians Turn 2, The Swordmasters are making very sort work of my Knights but nothing can save them now save for some divine providence. The Pegasus Knight charge the Seaguard closest to them, into the teeth of their spears. My Knights manage to rally themselves and reform back into the battle. The Magic Phase is weak again, my Prophetess failing to regrowth her unit. My peasants may escape a beating entirely, landing some rocks on the Seaguard again forcing them to panic. In combat the other Seaguard are broken by the Pegasus Knights and rundown the like dogs they are. The Swordmasters reduce my other Knights to nothing, only the Prophetess and BSB remaining to continue the fight.

Bretonnian Turn 2

High Elf Turn 3. Things are desperate now, the Seaguard manage to rally and angle towards the Knight-park I’ve managed to create. With little else to do the Swordmasters dispatch my noble heroes and make way towards their next victims.

Bretonnian Turn 3, The Swordmasters are becoming an issue so I decide to deploy my tactical nuke for such situations. My damsel breaks from her unit and heads to open ground as the rest o my army repositions itself. In the magic phase predictably the Damsel opens up with her power scroll casting Dwellers from below on the Swordmasters, sucking half the unit into the ground in the process.

High Elves turn 4, they’re fighting for pride now and move for some last-ditch attacks, the Seaguard charging my Damsel and the Swordmasters charging the Questing Knights. The Seaguard cruelly hacked the Damsel down with ease and overran into the Knights of the Realm. The Swordmasters continued their display and dispatched with the Questing Knights forcing them to flee from the table.

 Bretonnian Turn 4, The Swordmasters were becoming more than a nuisance, did they not know that the Horse and the Lance are the only true ways to go into war? Felling such mighty warriors on foot is just unseemly. The Pegasus Knights charged in to assist my beleaguered Knights of the Realm, into the rear of the Seaguard. Once again though it was my peasants that shone, landing with pin point accuracy on the Swordmasters reducing them to just the Champion. The last remain Seaguard were chased down by the Pegasus Knights.

There was one more turn where the sole remaining Swordmaster was crushed under a falling rock after toasting from crew with the Ring of Ruin.

Victory for Bretonnia!  The mission helped me a lot in this game, we started close together but with my War Machines miles away at the back of the board. Steve was also fairly unlucky it has to be said, having the Phoenix Guard driven off by my Knights turn 1 was not in his game plan I don’t think. The Dragon will only be coming out in much higher point games as well. From my perspective everything went as planned, Charge, Overrun, Repeat.